My First Batch of Strawberry Marshmallow Frosting
I still remember the first time I made this frosting. My granddaughter wanted pink cupcakes for her birthday party. I opened my pantry and saw a jar of strawberry preserves and a tub of marshmallow fluff. A light bulb went off. I mixed them into butter and sugar, and the kitchen smelled like a spring garden. Doesn’t that smell amazing? Have you ever tried mixing fruit into your frosting?
This recipe is not hard at all. A 12-year-old can make it with a little help. All you need is patience and a good mixer. The secret is in the little steps, like softening the butter first. I once used cold butter and ended up with lumpy frosting. I still laugh at that mess.
Soft Butter is Not Optional
Step one is simple. Take your butter out of the fridge an hour before you start. You want it soft enough that your finger leaves a dent. This matters more than you think. Cold butter will not trap air, and your frosting will be dense instead of fluffy. Why does this matter? Fluffy frosting is what makes a cake feel light and special. Soft butter builds the foundation.
Beat it for a full three to four minutes. I set a timer on my phone. The butter turns pale and looks like whipped clouds. That is the air you are adding. What is your favorite thing to make with buttercream? I love putting it on simple vanilla cake.
Marshmallow Fluff Makes It Magical
Now comes the fun part. Scoop the marshmallow fluff right into the whipped butter. Mix it until it is fully combined. The texture becomes light and dreamy. *Fun fact: Marshmallow fluff was invented in Massachusetts in the early 1900s. It was originally sold in tin pails!*
Scrape the sides of the bowl with a spatula. That way everything gets mixed evenly. I always let my kids lick the spatula. They fight over who gets it first. Do you have a helper in the kitchen who loves tasting?
Strawberry Preserves Bring the Flavor
Add the strawberry preserves and mix on low. Watch the color turn a soft pink. If you want it smoother, blend the preserves first. I usually strain out the seeds because my granddaughter does not like them. But some people love little fruit chunks. Which way do you prefer?
This step is where the frosting gets its fruity personality. The strawberry flavor is bright and natural, not fake like candy. Why does this matter? When you make frosting from scratch, you control what goes in. No artificial colors or weird syrups. Just real fruit and a pinch of salt to balance the sweetness.
Sugar Clouds and Sifting
Powdered sugar can make a huge mess. I always sift it into a bowl before adding it to the mixer. That keeps lumps away. Add it slowly, one cup at a time, on low speed. If you go too fast, you get a sugar cloud all over your counter. I may have done that once or twice.
After the sugar is in, beat it on high for a minute. The frosting thickens and becomes pipeable. You can add more sugar for a stiffer frosting or less for a softer spread. Taste it as you go. That is the best part of being the cook.
A Pinch of Salt and a Drop of Vanilla
Vanilla and salt are the quiet heroes. They do not shout, but they make everything better. The salt cuts the sweetness so it is not cloying. The vanilla warms up the strawberry flavor. Mix them in and give it one last taste.
If your frosting looks pale, you can add a drop of red or pink food coloring. I sometimes use freeze-dried strawberry powder instead. It adds color and more berry taste. That is my little trick for extra oomph. What is your favorite secret ingredient in frosting?
Chill and Pipe or Spread and Share
If your kitchen is warm, the frosting may feel too soft. Pop the bowl in the fridge for 10 minutes. Then give it a quick whip. It will hold its shape for piping. I use a big star tip to make swirls on cupcakes. They remind me of fluffy pink clouds.
You can store leftover frosting in a sealed container in the fridge for up to five days. Let it come to room temperature and re-whip before using. I like to make extra so I can sneak spoonfuls. Just between us, that is the best reason to double the recipe.
Instructions
Step 1: Let your butter sit out until it’s really soft — a good hour. Cold butter makes lumpy frosting, and nobody wants that. Measure the strawberry preserves too, and give them a quick blend if they’re chunky. (I once skipped this and got a seedy mess — learn from me!)
Step 2: Beat the softened butter in a big bowl with your mixer until it’s pale and fluffy, about 3 minutes. Then scoop in the marshmallow fluff and beat again. Watch it get all light and airy — that’s the magic. What’s your favorite marshmallow treat? Share below!
Step 3: Add your strawberry preserves and mix on medium speed. The frosting turns a pretty pink and smells just like summer. Don’t overmix — stop as soon as it looks even.
Step 4: Sift the powdered sugar into the bowl a little at a time so you don’t get lumps. Beat on low first or you’ll have a sugar cloud over your whole kitchen. Keep adding until it’s thick and spreadable — you might use 1 1/2 or 2 cups.
Step 5: Stir in vanilla and a pinch of salt. Taste it — does it need more sweetness? A little more strawberry? Adjust until it’s just right.
Step 6: If it’s hot outside or the frosting feels too soft, pop the bowl in the fridge for 10 minutes. Give it a quick whip, then spread or pipe away. Store leftovers in the fridge for up to 5 days — just let it come to room temp and re-whip.
Creative Twists
Want to make this frosting even more fun? Try these easy twists. … Swap strawberry preserves with raspberry or blackberry jam for a new berry twist. … Fold in a handful of mini chocolate chips after the sugar — the chocolate and strawberry taste like a fancy candy. … Add a teaspoon of lemon zest for a bright, sunshiney pop. Which one would you try first? Comment below!
Serving & Pairing Ideas
This frosting is perfect on vanilla or chocolate cupcakes. Spread it thick on a simple sheet cake for a party. For a fancy touch, top with a fresh strawberry slice and a tiny pinch of flaky salt. It also tastes amazing sandwiched between two graham crackers — like a strawberry s’more! Which would you choose tonight?
Storing Your Strawberry Marshmallow Frosting
This frosting keeps well in the fridge for up to five days. Use an airtight container so it doesn’t pick up other smells. Before you use it again, let it sit on the counter until soft. Then give it a quick whip with your mixer to bring back the fluffiness. *Fun fact: This frosting actually freezes beautifully for up to three months.* I remember the first time I made a double batch. I was nervous it would go to waste. But I froze half, and it tasted just as good a month later on my granddaughter’s birthday cake. Batch cooking saves time and stress. You always have something special ready for a last-minute treat. Have you ever tried storing it this way? Share below!
Freezing works well if you portion the frosting in small containers. Thaw it overnight in the fridge, then rewhip. Do not microwave it. That can break the butter and make it greasy. Storing this way matters because a good frosting is a gift you give your future self. You skip the mess and get straight to the fun part: decorating. Why does this matter? Because when you have homemade frosting on hand, you are more likely to bake from scratch. That means better flavor and fewer box mixes in your kitchen.
Three Common Problems and Easy Fixes
Problem one: your frosting is too runny. This often happens if the butter was too soft or you added too much strawberry preserves. The fix is simple. Pop the bowl in the fridge for ten minutes, then rewhip. I once made a batch that looked like pink soup. A short chill saved it completely. Problem two: your frosting is lumpy. That means your butter was not fully softened. Cold butter does not cream well. Fix it by letting the bowl sit at room temperature for a few minutes, then beat again on medium-high. Problem three: the frosting tastes flat. You likely forgot the salt. A pinch of salt balances the sweetness and wakes up the strawberry flavor. Which of these problems have you run into before?
Fixing these issues builds your cooking confidence. You learn to trust your eyes and hands, not just the recipe. That matters because baking is a skill, not a spell. You can always adjust. It also matters for flavor. A properly whipped, well-chilled frosting tastes light and creamy. A lumpy or runny one feels heavy and sad. Getting it right means every bite makes you smile. You deserve that joy in your kitchen.
Your Quick Questions
Can I use regular marshmallows instead of marshmallow fluff?
Yes, you can, but it takes a little extra work. Melt 1 1/2 cups of regular marshmallows with a tablespoon of water in a double boiler or microwave. Stir until smooth, then let it cool completely before adding to the butter. If you add warm marshmallow, your frosting will turn into a puddle. I have done this many times for batch cooking when the store was out of fluff. The texture is slightly less airy but still tasty. Room temperature is key here. Let the melted marshmallow sit until it feels cool to the touch on your wrist. That step matters more than you think. Reheat gently if it stiffens up before mixing.
What if my frosting is too thick?
That usually means you added too much powdered sugar or your kitchen is cold. Fix it by beating in one teaspoon of milk or cream at a time. You can also add a tiny splash of vanilla extract or even a little extra strawberry preserves. Go slowly. A few drops can change everything. I once over-sugared a batch and thought it was ruined. A tablespoon of cream brought it right back to silky smoothness. This works great for batch cooking because you can adjust each batch to the weather. On dry winter days, frosting needs more liquid. On humid summer days, it needs less. Trust your senses.
Can I use this frosting between cake layers?
Absolutely, but you need to be careful. This frosting is soft and fluffy, not stiff like buttercream. For a layer cake, chill each frosted layer in the fridge for fifteen minutes before adding the next. This prevents the cake from sliding. I learned this the hard way when my first layer cake ended up looking like a leaning tower. The strawberry preserves add moisture, which is lovely for flavor but can make the cake soggy if left out too long. Room temperature cake with cold frosting gives you the best texture. Reheat any leftover frosting gently on the counter before using. Which tip will you try first?
A Warm Goodbye from Lily Simmer
Thank you for spending time in my kitchen today. I hope this frosting brings you many sweet moments and happy faces around your table. Remember, every baker starts exactly where you are right now. Do not be afraid to taste and adjust as you go. Cooking is about love, not perfection. Have you tried this recipe? I would truly love to hear how it turned out for you. Share your story or a photo in the comments below. Your wins and your learning moments both matter here. Happy cooking! —Lily Simmer.

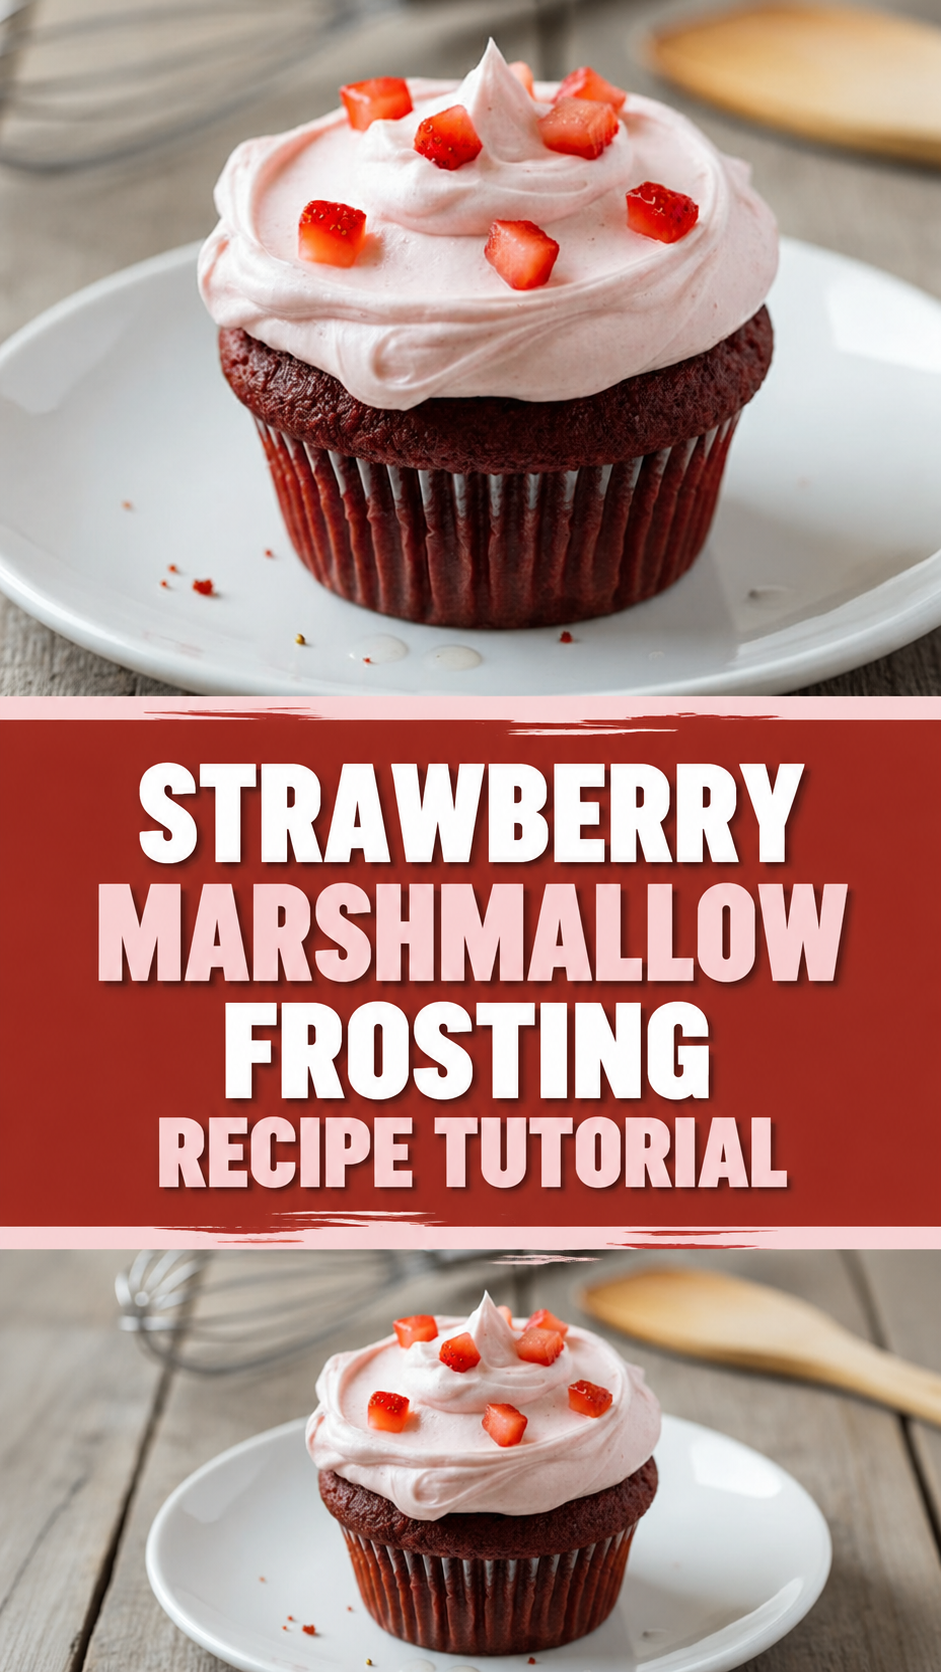
Strawberry Marshmallow Frosting Recipe Tutorial
Description
Delicious Strawberry Marshmallow Frosting – perfect for cakes, cupcakes, and more. Easy to make with simple ingredients.
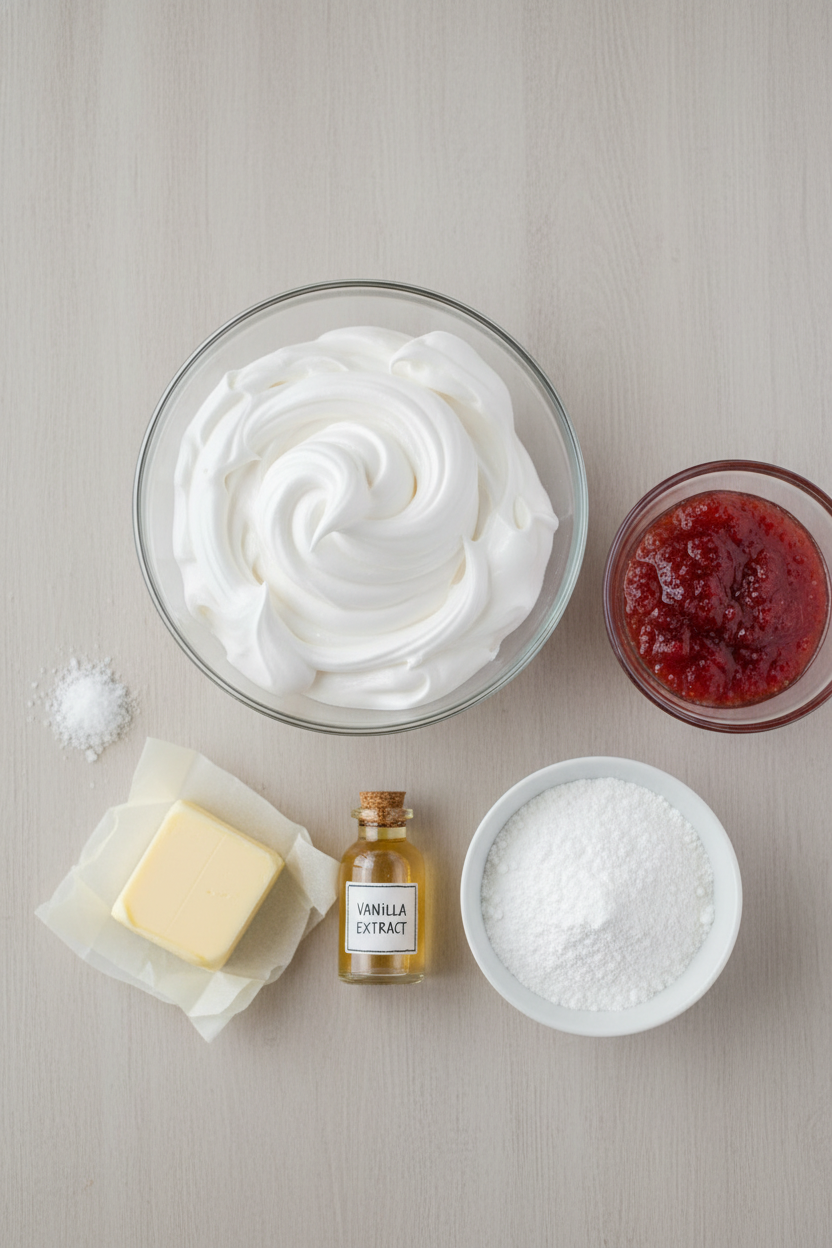
Ingredients
Instructions
- Before you begin, make sure your butter is fully softened. Cold butter won’t whip properly and will lead to a lumpy texture. Measure out all other ingredients so they’re ready to go. If using strawberry preserves, ensure they are smooth — you can strain or blend them to remove any chunks for a silkier frosting.
- Using a stand mixer fitted with the paddle attachment (or a hand mixer), beat the softened butter on medium-high speed for about 3-4 minutes. It should become pale, creamy, and visibly fluffy. This step builds the base structure of your frosting.
- Add the marshmallow fluff to the whipped butter. Beat on medium speed until fully combined and fluffy, about 1-2 minutes. Scrape down the sides of the bowl to make sure the mixture is well incorporated.
- Add the strawberry preserves or puree and continue to mix on medium speed. The frosting will turn a light pink hue and begin to develop its signature fruity aroma. Mix until evenly blended, but avoid overmixing.
- Gradually add the powdered sugar, starting with 1 1/2 cups. Sift it in small batches to prevent clumps. Beat on low at first to avoid sugar clouds, then increase to medium-high until the frosting thickens and becomes fluffy. Adjust the amount depending on desired sweetness and consistency.
- Add vanilla extract and a pinch of salt. Mix just until incorporated. Taste the frosting and make any final tweaks — more sugar for sweetness, more preserves for extra strawberry kick, or a touch of food coloring for color enhancement.
- If your kitchen is warm or the frosting feels too soft to pipe, place the bowl in the refrigerator for 10-15 minutes. Give it a quick whip before using.
- Your Strawberry Marshmallow Frosting is ready to use! Spread it generously on cakes or cupcakes, or transfer it to a piping bag for detailed decorations. If not using immediately, store in an airtight container in the fridge for up to 5 days. Let it come back to room temperature and re-whip before using.
Step 1: Prepare Your Ingredients
Step 2: Cream the Butter
Step 3: Add Marshmallow Fluff
Step 4: Incorporate Strawberry Preserves
Step 5: Sift and Add Powdered Sugar
Step 6: Finish with Vanilla and Salt
Step 7: Chill if Needed
Step 8: Use or Store
Notes
- Use room-temperature butter for smooth blending.
- Gradually add powdered sugar to avoid lumps.
- For intense strawberry flavor, use freeze-dried strawberry powder or reduce fresh puree to paste.
- Chill frosting 10–20 minutes if too soft before piping.
- Store in fridge; re-whip before using.
- Nutrition per 2-tablespoon serving: Calories: 160, Fat: 10g, Saturated Fat: 6g, Unsaturated Fat: 3g, Trans Fat: 0g, Cholesterol: 25mg, Sodium: 20mg, Carbohydrates: 19g, Sugar: 18g, Fiber: 0g, Protein: 0g.