Why I Love These Sugar Snail Rolls
I have been making these rolls since my daughter was little. She called them “snail hugs” because they curl up all cozy. Every time I pull a pan from the oven, the whole house smells like warm butter and sugar. Doesn’t that smell amazing?
You don’t need fancy tools or a bakery degree. Just a bowl, a rolling pin, and a little patience. The dough feels soft and springy in your hands. That is the best part of baking—getting your fingers right into it. Have you ever made bread dough from scratch?
A Secret From My Kitchen
Here is one little trick that changed everything for me. Use dental floss to slice the rolled log into pieces. I learned this from a friend who worked in a bakery. She said floss cuts clean without squishing the dough. I still laugh at that first try—I accidentally used mint-flavored floss! The rolls tasted fine, but it was a funny surprise.
If you use a knife, make sure it is very sharp. A dull blade will smush the soft dough. The goal is neat little spirals so every bite has the same buttery sugar middle. *Fun fact: The spiral shape was first used in pastries in ancient Rome, but they filled them with honey and nuts instead of sugar.*
Why This Matters More Than You Think
Baking these rolls teaches you something important: good things take time. The dough needs to rest and rise twice. You cannot rush it. When you let it puff up slowly, the flavor grows deeper and richer. That is why homemade always tastes better than store-bought.
Another reason this recipe matters: it is a perfect way to share a slow morning with someone you love. My grandson and I make these on rainy Saturdays. We take turns sprinkling the sugar over the butter. It is not just about food—it is about the quiet minutes together. What memory do you have of cooking with a grandparent or a friend?
The Little Steps That Make a Big Difference
Warm the milk just until it feels like bathwater. Not hot, or you will kill the yeast. Let the yeast sit with a bit of sugar until it gets foamy and smells alive. That foam tells you the yeast is happy. If it does not foam, the yeast might be too old. I once used a packet that had been sitting in my pantry for two years. Nothing happened. The dough stayed flat like a pancake.
The first rise should take about an hour. The dough will double in size—like a pillow puffing up. After you shape the snails, let them rise again for 30 to 45 minutes. Be patient. That second rise makes them light and fluffy. Why do you think we need two rises? Drop your guess in the comments.
How to Know When They Are Perfect
After 20 minutes in a 350-degree oven, check the tops. They should be golden brown and the sugar will look a little glossy. Let them cool for ten minutes before serving. That wait is hard, but it helps the sugar set into a soft, shiny coating. If you pull them too soon, the buttery sugar might run off the rolls.
I like to serve them warm with a glass of cold milk. They pull apart like little clouds with a sweet center. Do you prefer your pastries warm or at room temperature? Tell me which way you like best.
One Last Thought Before You Bake
Do not worry if your first batch looks a little uneven. The first time I made these, some rolls were fat and some were skinny. They all tasted wonderful. Baking is about learning with your hands. Every mistake teaches you something. That is why I still make these rolls after all these years—they never come out exactly the same, but they are always delicious.
So go ahead, preheat your oven, warm that milk, and get your hands sticky. I will be right here cheering you on. And if you try them, let me know how they turned out. I love hearing your kitchen stories.
Instructions
Step 1: Warm the milk until it feels like a warm bath on your finger. Mix it with the yeast and one teaspoon of sugar. Let it sit until it gets foamy on top, about five minutes. (The milk must be warm, not hot, or it will kill the yeast. I learned that the hard way.) Do you know why we let the yeast get foamy first? Share below!
Step 2: Add the rest of the sugar, the egg, the melted butter, and the salt. Stir in the flour slowly until a soft dough forms. It will look a little shaggy at first, like a messy blanket.
Step 3: Now you knead the dough on a floured counter. Push it with your palms for eight minutes until it feels smooth and springy. (If the dough sticks to your hands like glue, add just a tiny pinch of flour. Not too much!)
Step 4: Place the dough in a greased bowl and cover it with a towel. Let it sit in a warm spot until it doubles in size, about one hour. I still laugh at how round and puffy it gets. Does your dough look like a big, soft pillow? Share below!
Step 5: Punch the dough down gently to release the air. On a floured surface, roll it into a large rectangle. Try to make the shape even, like a carpet.
Step 6: Spread softened butter all over the dough with a spatula. Sprinkle a generous layer of sugar on top. I always think of making a sweet snow angel with the sugar.
Step 7: Roll the dough up tightly from the long side, like a log. Slice it into even pieces using a sharp knife or even dental floss. (Dental floss gives the cleanest cut without squishing the roll. My grandma taught me that clever trick!) Do you use a knife or floss? Share below!
Step 8: Arrange the little snails in a buttered baking dish. Cover them and let them rise until puffy, about 30 minutes. They will squeeze together like snug bugs.
Step 9: Bake at 350 degrees for 20 to 25 minutes until golden and fragrant. Your whole kitchen will smell like a bakery. (Watch the bottoms! If they brown too fast, lay a piece of foil on top.)
Step 10: Let them cool in the dish for 10 minutes. This is the hardest part because they smell so good. The sugar will set into a glossy, sticky finish.
Creative Twists
… Mix cinnamon and brown sugar into the filling for a cozy spice flavor.
… Drizzle a simple cream cheese glaze over the warm rolls for extra sweetness.
… Sprinkle chopped pecans or walnuts on top before baking for some crunch.
Which one would you try first? Comment below!
Serving & Pairing Ideas
Serve these snails warm alongside a tall glass of cold milk. They also pair beautifully with a hot cup of cocoa on a rainy afternoon. For a fancy touch, dust them with powdered sugar just before bringing them to the table. I love pulling them apart with my fingers while they are still a little sticky. Doesn’t that sound like the best breakfast or snack? Which would you choose tonight?

How to Keep Your Snail Rolls Soft and Sweet
Let me tell you about the first time I stored these rolls. I wrapped them in plastic too tight, and they got soggy. What a mess! Now I know better. Let the rolls cool completely before you wrap them. This keeps the sugar crust from turning sticky. Store them in an airtight container at room temperature for up to two days.
For the freezer, wrap each roll in foil first. Then place them all in a freezer bag. They will stay fresh for a whole month. When you want one, pop it in the microwave for 15 seconds. Or warm it in the oven at 300°F for five minutes. Batch cooking matters because it saves you time on busy mornings. You can pull out one roll for a quick, buttery treat. Have you ever tried storing it this way? Share below!
Why does this matter? Good storage means your hard work lasts. You get to enjoy that soft, sugary bite days later. It feels like a little gift from your past self. Fun fact: These rolls taste even better the next day. The sugar and butter really soak into the dough overnight.
Three Tiny Troubles (And How to Fix Them)
I remember the first time my dough would not rise. I cried a little, I am not too proud to say. The fix was simple. My kitchen was too cold. Warm the bowl with hot water first. Then place your dough in a turned-off oven with a cup of hot water. That gentle heat wakes up the yeast every time.
Are your rolls a little flat? You might have rolled the dough too thin. Next time, keep the rectangle about half an inch thick. That gives the snails enough fluff to puff up tall in the pan. One more thing: if the tops burn before the centers bake, cover the pan with foil halfway through. This lets the inside cook through while the top stays golden.
Why does fixing these problems matter? It builds your confidence in the kitchen. When you know how to rescue a recipe, you stop being scared. You also get better flavor. A properly risen roll tastes light and rich, not dense and doughy. Which of these problems have you run into before?
Your Quick Questions
Can I use instant yeast instead of active dry yeast?
Yes, you can swap them easily. With instant yeast, you do not need to proof it in warm milk first. Just mix it directly into the flour. The only thing to watch is the liquid temperature. Instant yeast can handle slightly warmer milk. But keep the milk warm to the touch, not hot. If the milk feels like a cozy bath, you are good. The dough will rise a little faster, so check it after 45 minutes during the first rise. Your rolls will still turn out soft and buttery.
Why did my rolls turn out hard and crusty?
This usually means you baked them too long or the oven was too hot. Ovens lie sometimes. Invest in a cheap oven thermometer. Pull the rolls out when they are just golden, not dark brown. Another reason is not enough butter in the dough. The melted butter and the egg are what keep these rolls soft and tender. Make sure you measure your butter exactly. Too little fat means a dry crumb. Also, cover the rolls with a clean towel after baking to trap steam and keep them soft.
Can I use milk that is not whole milk?
You can use 2% milk without a problem. The rolls will still be soft and rich. Skim milk works too, but they will be a little less tender. Whole milk has more fat, which gives you that extra fluffy texture. If you only have skim milk, add one tablespoon of melted butter to the milk to make up for the missing fat. This trick works every time. The yeast does not mind. Your dough just needs a warm, cozy liquid to start rising. Which tip will you try first?
A Sweet Little Goodbye from Lily
I hope these tips help you feel brave in the kitchen. Baking is just like a warm hug you can share. Each snail roll you make is a tiny celebration. I would love to hear how yours turn out. Have you tried this recipe? Tell me about your batch in the comments below. Happy cooking!
—Lily Simmer

Buttery Soft Sugar Snail Rolls
Description
Soft, buttery sugar snail rolls – a delightful sweet treat.
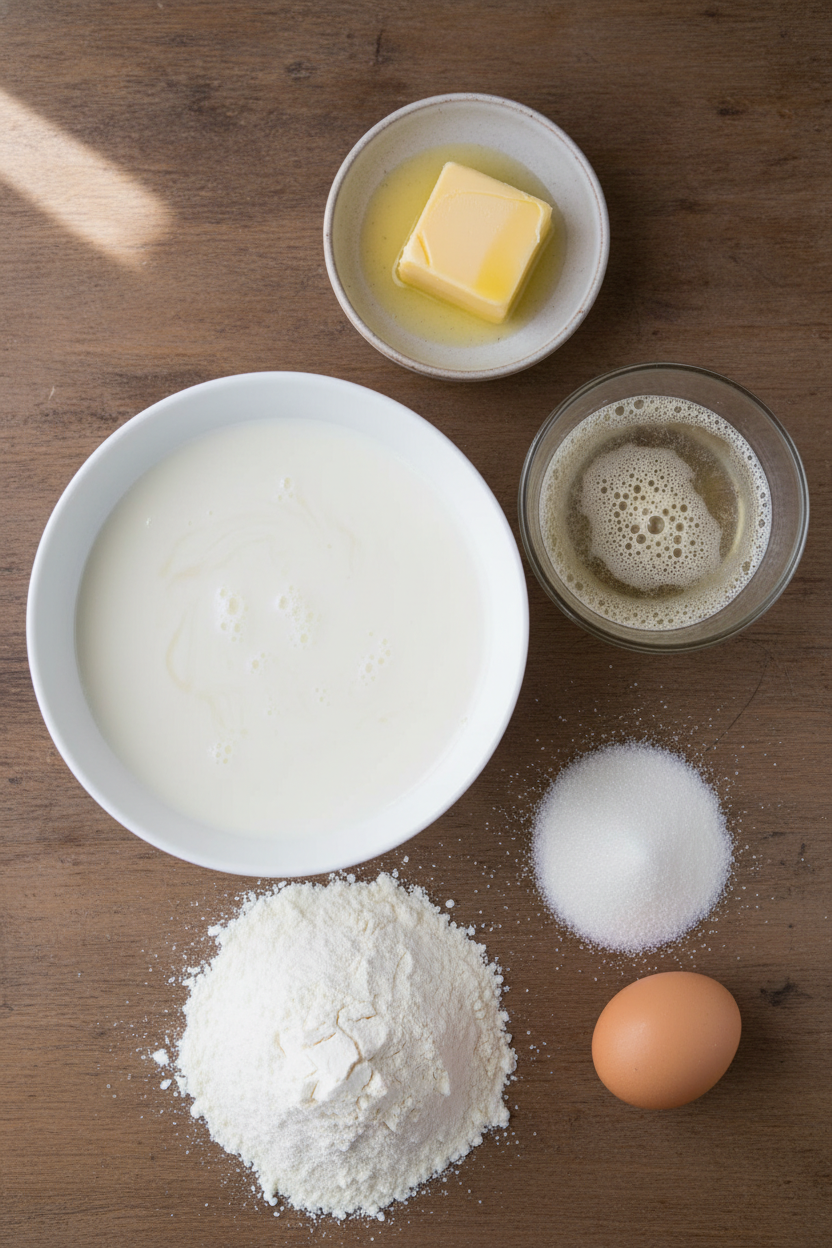
Ingredients
Instructions
- Warm the milk until just warm to the touch (not hot). Mix with yeast and a teaspoon of sugar and let it sit until foamy.
- Add the remaining sugar, egg, melted butter, salt, and flour. Mix until a soft dough forms.
- Knead by hand or mixer for 8–10 minutes until smooth and elastic. The dough should be slightly tacky but not sticky.
- Place dough in a lightly greased bowl, cover, and let rise in a warm spot until doubled in size (about 1–1½ hours).
- Roll dough into a large rectangle on a lightly floured surface.
- Spread softened butter evenly over the dough, then sprinkle generously with granulated sugar.
- Roll tightly from the long side into a log. Slice into even pieces using a sharp knife or dental floss.
- Arrange snails in a baking dish, cover, and let rise for 30–45 minutes until puffy.
- Bake at 350°F (175°C) for 20–25 minutes until golden and fragrant.
- Let rest for 10 minutes before serving so the sugar sets into a glossy finish.
Prepare the Dough
Shape the Snails
Bake and Serve
Notes
- Use room temperature butter and eggs for a soft dough.
- Activate yeast in warm milk (110°F).
- Knead 8-10 minutes until smooth.
- Let rise in a greased bowl until doubled.
- Roll into rectangle, spread softened butter, sprinkle cinnamon-sugar.
- Roll tightly, slice into rolls.
- Place in greased pan, rise again.
- Bake at 350°F until golden.
- Brush with melted butter immediately.