The Day I Tried to Impress My Neighbor
Last summer, my neighbor Mrs. Bell brought over a tray of dry brownies. She was so proud, but they were hard as rocks. I didn’t have the heart to say no, so I crumbled them up and hid them in the pantry.
A few days later, I had a craving for something creamy and chocolatey. Those sad brownie crumbs became the start of something wonderful. I still laugh at how a mistake turned into my favorite dessert cups.
Why Softened Cream Cheese Matters
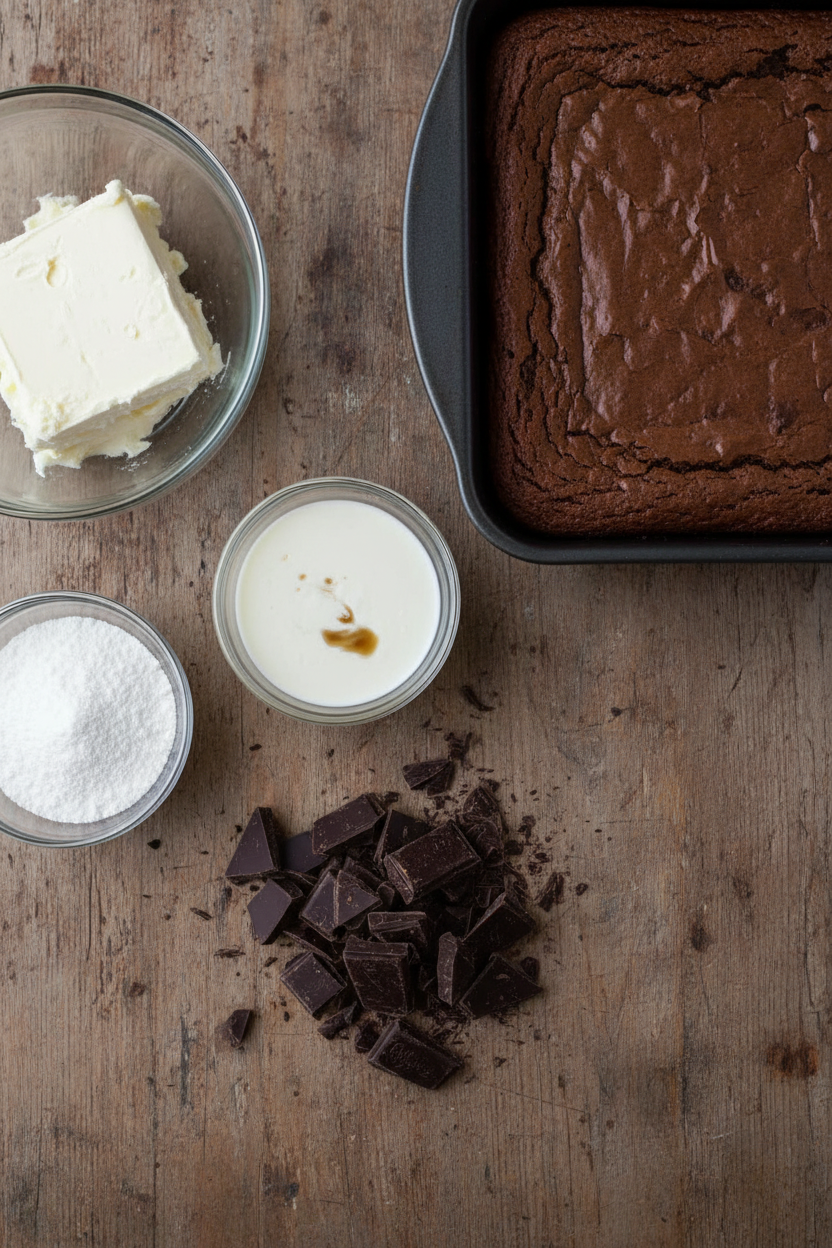
You might be tempted to use cold cream cheese straight from the fridge. Don’t do it. Cold cream cheese makes lumpy mousse, and nobody wants a lumpy surprise in their dessert.
Let it sit on the counter for about 30 minutes before you start. That little bit of patience gives you a silky, dreamy filling. *Fun fact: Cream cheese was invented by accident in 1872 when a New York dairyman tried to make a French cheese and got something even better instead.* See? Accidents can be delicious.
Folding, Not Stirring
When you mix the whipped cream into the cream cheese, use a gentle hand. Imagine you’re tucking a baby into a blanket. Lift the spatula from the bottom and fold over the top. Do this slowly.
If you stir too hard, all the air bubbles pop and your mousse turns flat. Why does this matter? Because the bubbles are what make it light and fluffy. You want each spoonful to feel like a cloud with a chocolate hat on. Have you ever made a mousse that fell flat? I’d love to hear your tricks in the comments.
Brownie Layers: Chunky or Smooth?
Some folks like their brownie bits fine like sand. I like mine chunky, with little pieces you can chew. When you crumble the brownies, leave some big chunks the size of a pea.
That texture gives the dessert two feelings at once: creamy on top, chewy on the bottom. Doesn’t that sound amazing? You can use store-bought brownies if you’re in a hurry, but homemade ones add extra love. Do you usually bake from scratch or take a shortcut? Be honest—I’ve done both.
The Assembly Dance
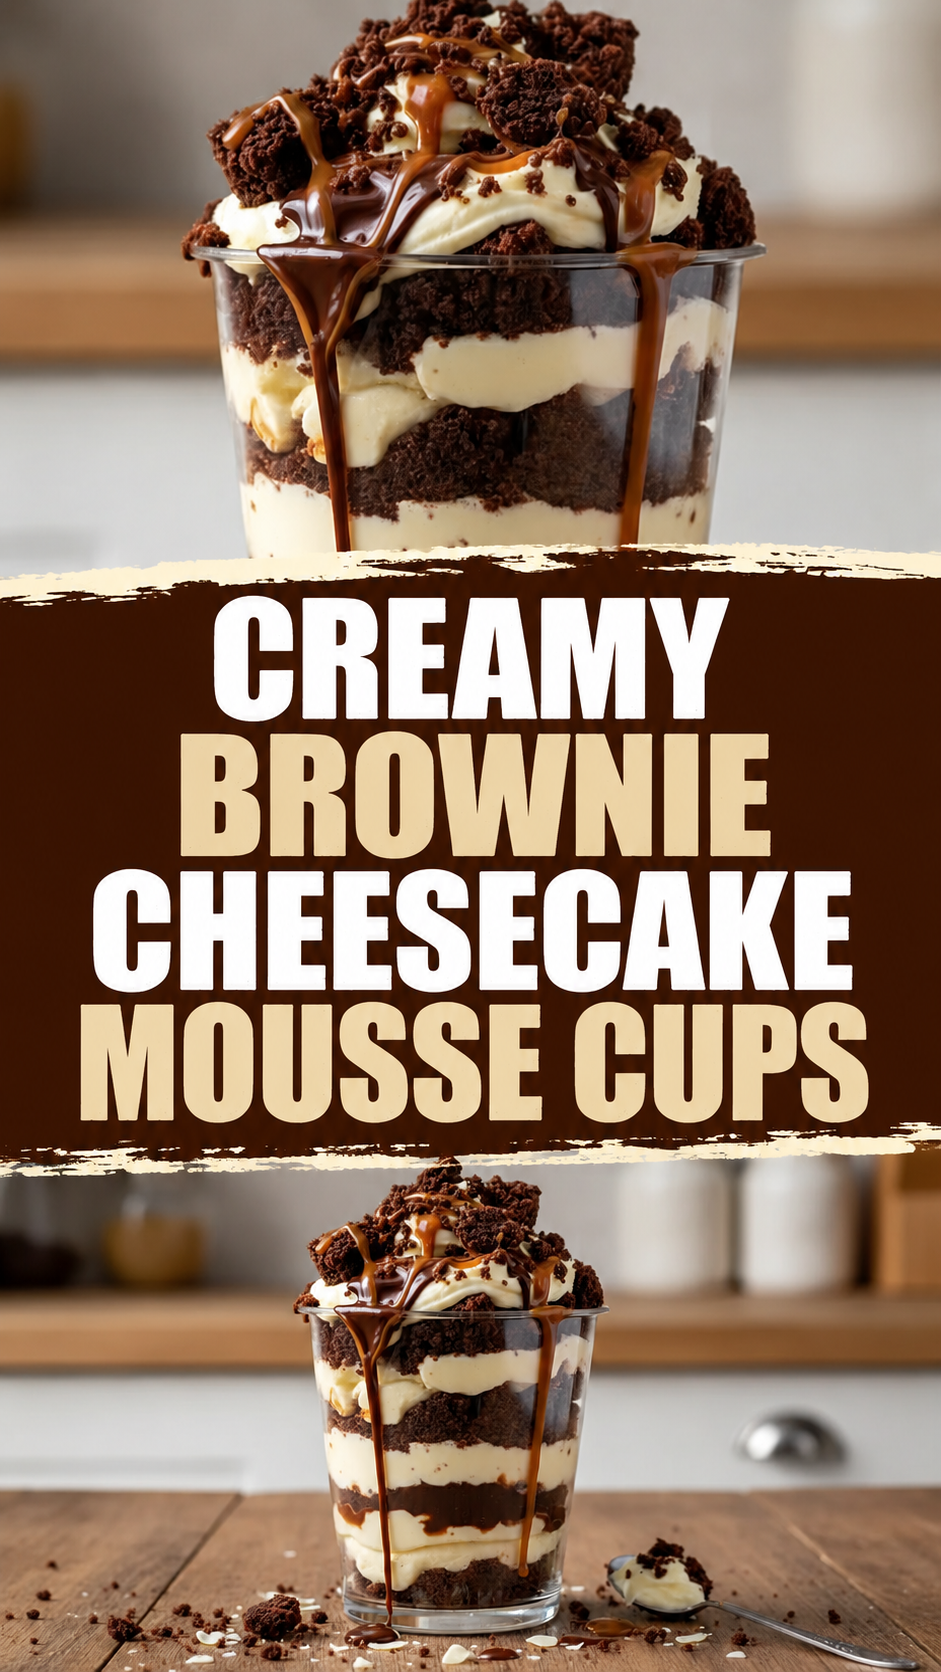
Grab your favorite glass cups or little jars. Start with a layer of brownie crumbs. Then a layer of cheesecake mousse. Then drizzle chocolate ganache and caramel sauce. Repeat one more time.
Why this matters: layering isn’t just for looks. Each bite gives you a little bit of everything—sweet, tangy, crunchy, smooth. It’s like a tiny symphony in your mouth. And the best part? You don’t need any fancy tools. A spoon and a jar will do just fine.
Chill Time is Not Optional
I know you want to dig in right away. I’ve been there. But trust me, these cups need at least an hour in the fridge. The mousse sets up, the flavors hug each other, and everything gets cold and dreamy.
If you’re really impatient, pop them in the freezer for 30 minutes. That gives you almost an ice-cream texture. I once served these to my grandkids straight from the freezer on a hot July day. They said it was the best thing ever. What’s your favorite way to chill desserts—fridge or freezer?
A Tiny Trick with Sea Salt
Before you serve, sprinkle a tiny pinch of flaky sea salt on top. Just a few flakes. The salt makes the chocolate taste deeper and the caramel sweeter. It’s like magic.
Why does this matter? Our tongues love contrast. Sweet and salty together wake up your taste buds. It’s the same reason we put salt on cookies. Try it once, and you’ll never skip that step again. Have you ever tried a sweet-and-salty dessert? Tell me your favorite combo—I’m always looking for new ideas.
Instructions
Step 1: Start with softened cream cheese for a silky filling. Beat it with powdered sugar and vanilla until smooth. (Here is a hard-learned tip: always let cream cheese sit out for 30 minutes first.) Whip cold heavy cream to stiff peaks, then fold it gently into the cream cheese. This keeps the mousse light and airy.
Step 2: Crumble your brownies into bite-sized chunks, not fine dust. Use homemade or store-bought — either works great. I still remember making these with leftover brownies from a bake sale. They should feel moist and fudgy, not dry.
Step 3: Grab small cups or jars and start layering. Put down a layer of brownie crumbs, then a scoop of cheesecake mousse. Drizzle some chocolate ganache and caramel sauce on top. Repeat the layers once more. Does your family have a favorite brownie recipe? Share below!
Step 4: Finish with a sprinkle of extra brownie crumbs on top. Add another drizzle of ganache and caramel for a pretty look. For a fancy touch, drop a dollop of whipped cream or a mini brownie square. A pinch of flaky salt makes it sweet and salty.
Step 5: Pop the cups in the fridge for at least one hour. Two or three hours is even better — it lets the flavors meld. Serve them cold with a spoon. If you want an ice-cream-like texture, freeze them for 30 minutes first. Doesn’t that sound perfect?
Creative Twists
… Swap the brownie layer for crushed chocolate cookies or Oreos. It gives a different crunch but keeps the chocolate love. … Add a layer of fresh berries like sliced strawberries or raspberries between the mousse. The tartness cuts the sweetness. … Use peanut butter in the cheesecake filling. Mix two tablespoons of creamy peanut butter into the cream cheese before folding. Which one would you try first? Comment below!
Serving & Pairing Ideas
Serve these mousse cups with a side of fresh fruit, like sliced bananas or berries. A light dusting of cocoa powder on top looks elegant. For a cozy treat, pair them with a small glass of cold milk or a warm coffee. They also work as a fancy dessert for a party — everyone grabs their own cup. Which would you choose tonight?
How to Store and Reheat Brownie Cheesecake Mousse Cups
These little cups are best eaten fresh. But they store very well. I remember my first batch. I made too many for a family dinner. I panicked. Then my neighbor told me to just pop them in the fridge. They tasted even better the next day. The flavors had time to settle.
Store the cups in the fridge. Cover them with plastic wrap or a lid. They stay good for up to three days. Do not freeze the assembled cups. The cream cheese mousse gets watery. But you can freeze the crumbled brownies alone for up to a month. That saves time for next time. Why does batch cooking matter? It means dessert is ready when you are. No last-minute stress.
To reheat, just take a cup out of the fridge. Let it sit for 10 minutes. That takes the chill off. Do not microwave it. The mousse will melt. Just enjoy it cold. It tastes like a creamy cheesecake bite. Have you ever tried storing it this way? Share below!
Three Common Problems (and Easy Fixes)
Problem one: the brownie layer is too crumbly. It falls apart when you scoop. The fix is easy. Press the brownie crumbs down gently with a spoon. That gives you a firm base. I once forgot this step. My cups turned into a messy pile. Not pretty.
Problem two: the mousse is too runny. This happens when the cream cheese is cold. Always let it soften to room temperature. Also make sure your heavy cream is very cold before whipping. That gives you stiff peaks. *Fun fact: Cold cream whips up to three times faster than warm cream.* Fixing this matters because a thick mousse holds its shape. That makes your dessert look fancy and taste light.
Problem three: the layers mix together. This ruins the pretty stripes. The fix is patience. Chill the brownie layer for 15 minutes before adding the mousse. Then chill again before adding more toppings. Why does this matter? It builds your cooking confidence. You learn to trust yourself. Which of these problems have you run into before?
Your Quick Questions
Can I use low-fat cream cheese?
You can, but the mousse will be thinner. Low-fat cream cheese has more water. That makes the filling less stable. For the best texture, use full-fat cream cheese. Let it soften completely at room temperature. That helps it blend smooth. If you must use low-fat, add an extra tablespoon of powdered sugar. That helps thicken it a little. The flavor will still be good, just not as rich. For special occasions, stick with the full-fat version. Your taste buds will thank you.
Can I make these cups ahead for a party?
Yes, you can make them a day ahead. That is actually the best plan. The flavors mingle and get deeper overnight. Assemble the cups completely. Cover them tightly with plastic wrap. Store them in the fridge. Do not add the final toppings until just before serving. The brownie crumbs stay crunchier that way. Take the cups out 15 minutes before guests arrive. Let them sit at room temperature. That makes the mousse softer and creamier. Your guests will think you worked all day. You can smile and enjoy the party too.
What if I do not have a piping bag?
No problem at all. A simple spoon works perfectly. Use a small spoon to drop the mousse into the cup. Or use a zip-top bag. Fill it with the mousse. Snip off one tiny corner. Squeeze it like a piping bag. That gives you clean layers. If you want a smoother top, use the back of the spoon to spread it gently. Do not stir. Just pat it down. The texture stays light and airy. This trick works for any no-bake dessert. Which tip will you try first?
A Warm Send-Off from Lily Simmer
Thank you for spending time in my little kitchen. I hope these tips help you make perfect mousse cups. Cooking is about sharing. It is about trying again when something goes wrong. Do not worry about tiny mistakes. Just keep folding and tasting. Have you tried this recipe? I would love to hear how it turned out. Drop a comment below. Tell me your favorite topping. Happy cooking!
—Lily Simmer

Creamy Brownie Cheesecake Mousse Cups
Description
Decadent layered dessert with fudgy brownies and creamy cheesecake mousse, topped with chocolate ganache and caramel.
Ingredients
Brownie Layer:
Cheesecake Filling:
Toppings:
Instructions
- Start with softened cream cheese to ensure smooth blending. In a mixing bowl, combine the cream cheese, powdered sugar, and vanilla extract. Beat until the mixture is silky and lump-free. This is the flavor base for your mousse.
- Next, whip the heavy cream in a separate bowl until stiff peaks form. Gently fold the whipped cream into the cream cheese mixture using a spatula. This folding process keeps the filling light and airy. Do not stir aggressively—use gentle, upward folds to maintain the mousse-like consistency. Tip: Make sure the cream is very cold before whipping for maximum volume.
- Use either homemade or store-bought brownies. If using homemade, let them cool completely before crumbling. You want moist, dense brownie pieces, not dry crumbs. Crumble them into bite-sized chunks—not too fine, so you retain some texture.
- Grab your serving vessels—glass dessert cups, small jars, or even plastic tumblers work beautifully.
- Layer 1: Brownies – Start by adding a layer of crumbled brownies at the bottom. Gently press down for a firmer base or leave them loose for a rustic texture.
- Layer 2: Cheesecake Mousse – Using a piping bag or a spoon, dollop the cheesecake mousse on top of the brownie layer. Smooth it out gently.
- Layer 3: Drizzles – Add a drizzle of chocolate ganache and caramel sauce.
- Repeat – Repeat the brownie and cheesecake layers once more, followed by another generous drizzle of ganache and caramel.
- Sprinkle extra brownie crumbs on top for added texture and a rich, chocolatey bite. Drizzle additional ganache and caramel over the top. For an extra flourish, add whipped cream, a mini brownie square, or chocolate shavings. Optional: Sprinkle with flaky sea salt for a sweet-and-salty finish.
- Refrigerate the cups for at least 1 hour, preferably 2–4 hours, to allow the flavors to meld and the cheesecake to firm up. Serve chilled with a spoon. Make it extra cold? Pop them in the freezer for 30 minutes before serving for an ice cream cake-style texture.
Step 1: Make the Cheesecake Filling
Step 2: Prepare the Brownie Layer
Step 3: Assemble the Cups
Step 4: Top It Off
Step 5: Chill and Serve
Notes
- Use room-temp cream cheese for smooth mousse.
- Bake brownie cups in muffin liners, let cool completely.
- Fold whipped cream gently into cheesecake mixture.
- Chill assembled cups at least 2 hours.
- Garnish with chocolate shavings or berries just before serving.